Learn About DSPACE
DSPACE, your gateway to scholarly content, offers a wealth of information, including peer-reviewed research articles, theses, dissertations, conference proceedings, technical reports, and various publications. Accessible and searchable, DSPACE allows you to explore diverse academic fields, find the content you need quickly, and support your research with proper citations. Start your discovery journey with DSPACE today!. Download Dspace
Collection Management
The collection is a level within a community or sub-community that holds items. This document provides an overview of creating, editing, and deleting a collection.
The documentation below assumes that the user has the relevant authorizations. For example, the admin menu and edit buttons would appear to a user having collection administration permission.
If you’re unsure about collection administration permissions assigned to your account for the target community, contact your system administrator.
Create Collection
Create Collection
Step 1: Login using your credentials

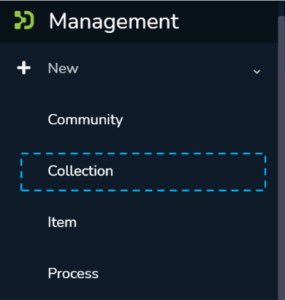
Step 2: Rollover your cursor on the “+” sign

Step 3: Click on “New” and click on “Collection” to proceed with the collection creation process.

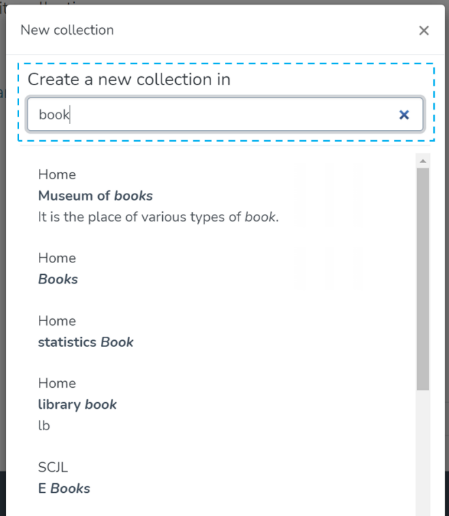
Step 4: A pop-up window showing list of communities will appear. Type the community’s name in the search field where you want to add this collection. Upon typing a few letters of the community’s name, a list of communities having those letters or words will appear. Click on the community name for initiating collection creation.
Step 5: The application will take the user to the create collection form to populate information regarding the collection. Please find below the description of this form.
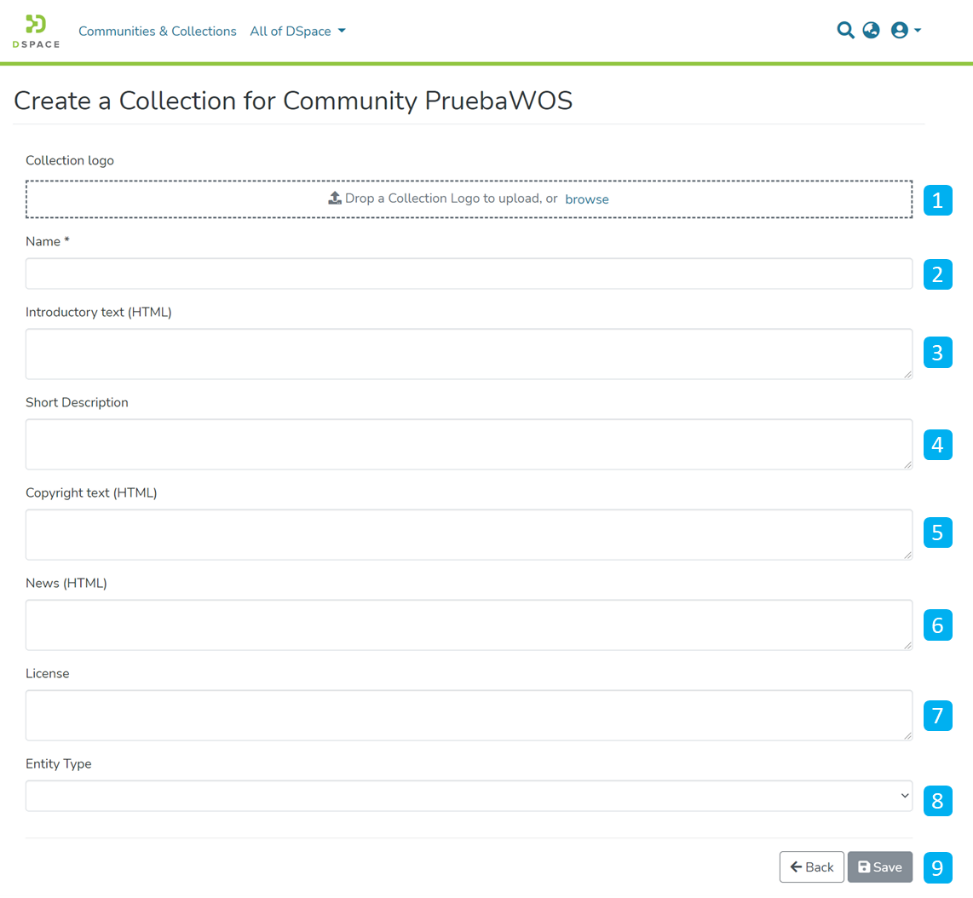
- Collection logo – Click on the ‘browse’ link to select an image file user wants to add as the collection’s logo. It is advisable to maintain uniform dimensions of the logo across the repository.
- Name – Enter the collection’s name here. It is a mandatory field and marked in ‘*.’
- Introduction text (HTML) – Users can enter introductory text providing an overview of the contents stored in this collection. One can utilize HTML tags to format the text or continue entering the plain text content.
- Short Description – This field can have a one-liner description of the collection that appears with the collection name on the community homepage.
- Copyright text (HTML) – Users can enter copyrights related information here. Fields marked with (HTML) support HTML tags-based formatting.
- New (HTML) – Enter news about this collection. Users can update this by going to this section via edit collection regularly.
- License – Add license-related information here.
- Entity Type – Select Entity from the drop-down that must be uploaded in the collection.
- Action Button – Users can click on the appropriate button as determined. Clicking on the Save button will add the collection into the repository.
Step 6: Click on the ‘Save’ button to complete the Collection creation process. A success prompt will pop up upon collection creation, and the application will automatically open the collection homepage.
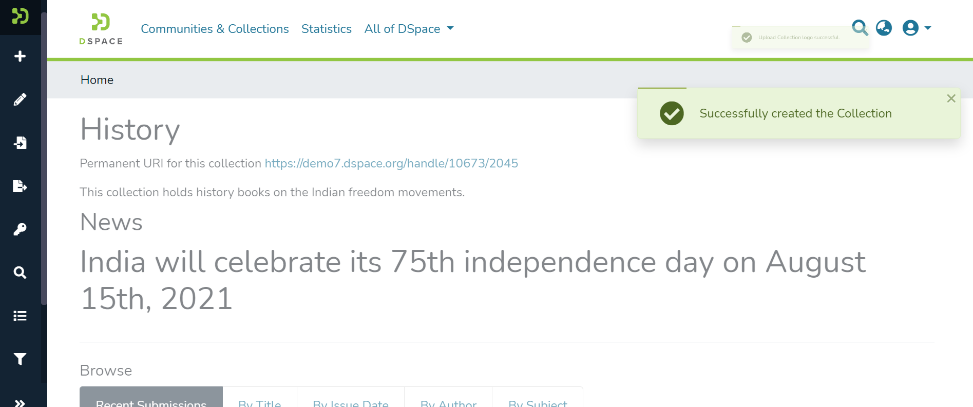
Success prompt upon collection creation

Collection homepage
Delete Collection
Delete Collection
Step 1: Login using your credentials

Step 2: There are multiple ways to initiate the delete collection process. One of them is by going to the target collection using Admin options. Rollover your cursor on the”Edit“ sign.

Step 3: Click on “Edit” and click on “Collection” to proceed with the edit collection process.


Step 4: A pop-up with the list of collections will appear. Type the Collection’s name in the search field you want to delete. A list of collections having typed values will appear upon typing a few letters of the Collection’s title. Click on the Collection to continue with the deletion.

Step 5: The application will take the user to the edit collection form. To initiate the collection deletion, the user must click the ‘Delete this collection’ button.

Step 6: Click on the Confirm button to continue with the collection deletion or click on the Cancel button to return to the previous page.

Success prompt confirming the deletion will appear, and the DSpace homepage will open.

Edit Collection
Edit Collection
Step 1: Login using your credentials

Step 2: There are multiple ways to initiate the Edit collection process. One of them is by going to the target collection using Admin options. Rollover your cursor on the “Edit” sign.

Step 3: Click on “Edit” and click on “Collection” to proceed with the edit collection process.


Step 4: A pop-up window showing list of collections will appear. Type the collection’s name in the search field you want to edit. Upon typing a few letters of the collection’s name, a list of collections with those letters or words will appear. Click on collection for initiating editing.

Step 5: The application will take the user to the edit collection form. The user can perform a range of actions to edit the collection. Each tab is explained in a separate process in this document.

- Delete this collection – The button provided for deleting the collection. Detailed steps are explained in the latter part of this document.
- Tabs – Edit collection has a variety of activities involved, which are grouped in a logical manner across various tabs. Below is the summary of these tabs
- Edit Metadata – Tab covers activities related to editing Collection’s profile information
- Assign Roles – This tab allows users to create specific roles for the collection
- Content Source – This tab enables harvesting the contents from various sources using OAI standards
- Curate – Users can set up various workflows related to content curation in this tab
- Authorizations – Under this tab, users can manage various groups created for managing different access rights and workflows specific to the collection
Edit Metadata
Step 6: Edit Metadata tab allows users to update the collection’s profile-related information, a.k.a. collection Metadata.
Various actions on this tab are explained immediately after the Edit Metadata illustration is added below.

- Template Item – Users can add metadata elements and values during item submission in this collection. Item submitters can update or delete these pre-populated values during the submission process.
- Collection logo – Click on the delete button to remove the existing logo or add it if no logo exists.
- Name – Update the existing collection name in this field.
- Introduction text (HTML) – Update introductory text if already added or can add new text. One can utilize HTML tags to format the text or continue entering the plain text content.
- Short Description – Update the collection description or add a fresh short description for the collection.
- Copyright text (HTML) – Update copyrights related information in this field. Fields marked with (HTML) support HTML tags-based formatting.
- New (HTML) – Add/Update news specific to this collection in the field.
- License – Add/Update license-related information here.
- Entity Type – Once added an entity to the collection, the value remains constant and uneditable.
- Action Button – Clicking on the Save button will update the metadata information for the collection.
Template Item
Step 7: Click the ‘Edit’ button under the Template Item section to add metadata elements with pre-populated values for the item submission process.

Step 8: Click on the Add button to add the metadata element.

Step 9: Users can start typing metadata elements as demonstrated below and select the appropriate component from the drop-down list.

Step 10: Enter the desired value in the Value field, and enter the ISO code of the language used. Then, click on add button for adding the template metadata element.

Step 11: Users can click on the action buttons appearing to the right of the element added for updating or deleting the value-added in the element.

Step 12: Click on the Save button to finish the template edit process. A pop-up notification confirming successful updates of the metadata element will appear, as demonstrated below.

Step 13: Click on the Save button appearing at the bottom of the Edit Metadata tab to save all updates. A success prompt will appear, and the collection homepage will open.

Assign Roles
Step 14: This tab helps assign users to roles designed for the collection. These roles include administrative, maker-checker, and content consumption activities. The description for each role is provided below the screenshot.

- Administrators – The collection administrator can assign rights like item submission, edit item metadata, and map existing items from other collections to this collection. Click the create button to create a dedicated Administrator group for the collection.
- Submitters – Users or User groups part of this group can submit items to the collection. Click on the create button to add specific users and user groups to perform item submission.
- Default item read access – E-People and Groups can read new items submitted to this collection. Changes to this role are not retroactive. Existing items in the system will still be viewable by those who had read access at the time of their addition. Click the restrict button to restrict default item read access rights to a specific user group.
- Default bitstream read access – E-People and Groups added in this section can read bitstreams (attachments) in items by default. Click the restrict button to restrict default bitstream read access rights to a specific user group.
- Editors – Editors can edit the metadata of submissions and then accept or reject them. Click on the create button to add the workflow step of editing metadata and assigning roles to specific users or user groups.
- Final editors – Final editors can edit the metadata of incoming submissions but can not reject them. Click the create button to add this workflow step to the collection and assign a role to specific users or user groups.
- Reviewers – Reviewers can accept or reject incoming submissions. However, they can not edit the metadata. Click the create button to add this workflow step to the collection and assign a role to specific users or user groups.
Content Source
Step 16: This tab enables harvesting the content from external sources using OAI standards. Users can start harvesting by clicking the checkbox, “This collection harvests its content from an external source.”

Step 17: Users will see various parameters related to OAI-based content harvesting upon clicking the checkbox as explained in the previous step. Below is the explanation of elements appearing under Configure an external source header.

OAI Provider – Enter the source OAI provider’s URL.
OAI specific set id – Enter the set ID to source content.
Metadata Format – Select suitable metadata format using the dropdown list, e.g., Simple Dublin Core, Qualified Dublin Core, and DSpace Intermediate metadata.
Harvest metadata only – Select this option to harvest only metadata from the source.
Harvest metadata and references to bitstreams (requires ORE support) – Click on this option to harvest metadata and reference links to corresponding bitstreams.
Harvest metadata and bitstream (requires ORE support) – Use this option to harvest both metadata and corresponding bitstreams into the target repository.
Click on the ‘Save’ button to update harvesting settings.
Upon clicking the save button and subject to successful validation of values entered, “Harvest Status” will turn to “Ready,” as demonstrated in the screenshot below.

After successfully configuring an OAI profile, these buttons will get active, and the user can start harvesting data immediately.
Users can click the “Test configuration” button to test settings and see a response message, as demonstrated on the screen below.

Upon successfully testing settings, click on the “Import now” button to harvest metadata immediately.
Curate
Step 18: The Curate tab provides various workflows for curating items stored in the collection. Below are standard flows, and there can be customized curation workflows as well
- Profile bitstream formats
- Check for Required Metadata
- Check Links in Metadata
Users must select a workflow from the dropdown list and click the “Start” button to initiate the curation process.

Authorizations
Step 19: Authorizations tab has all the policies defined for the collection. These are in addition to policies created from the “Assign Roles” tab. Key actions available in this tab are explained below.

- Manage Policies – Click the Add button or select policies from the table to create a new policy. Next, click on the Delete selected button for a batch deletion of the policies.
- Edit policy and members in a policy – Click the edit button to edit an individual policy or click on the group icon to edit the user group.
Step 20: Click on Add button to create a new Authorization policy.

Step 21: Users can add information in the fields available in this form to the policy and save it by clicking the submit button. Please see the description of each field followed by the below screenshot.

- Name: Enter the Policy name in this field.
- Description: Enter the Policy description here for future reference and understanding of other users.
- Select the policy type: The user can select one of the following policy classification types from the list
- TYPE_SUBMISSION: a policy in place during the submission
- TYPE_WORKFLOW: a policy in place during the approval workflow
- TYPE_INHERITED: a policy that has been inherited from a container (the collection)
- TYPE_CUSTOM: a policy defined by the user during the submission or workflow phase
- Select the action type: The user can select one of the following actions from the dropdown list:
- READ
- WRITE
- REMOVE
- ADMIN
- DELETE
- WITHDRAWN_READ
- DEFAULT_BITSTREAM_READ
- DEFAULT_ITEM_READ
- Start date – end date: The user can select the start date and end date for using the policy, should they want to apply it for a fixed period.
- The eperson or group that will be granted the permission: List of users/groups selected for granting permission under the policy
- Search for an ePerson / Search for a group: Select ePerson or group for searching the entity
- Search field: Enter keywords for searching the ePerson/Group
- ePerson/Group list: Click on the select button against the user/group you want to add to the policy
- Submit/Cancel button: Click on the Submit button to complete policy creation or click on the Cancel button to cancel the entire process.
You’ll see a confirmation prompt upon successfully creating the policy, as shown below. After that, the user will be back on the Authorizations screen.
Item Mapper
Manage mapped items
Step 22: The item mapper tab allows users to map items from other collections and manage mapped items.

Step 23: You’ll see items mapped with collections under the “Browse mapped items” tab. Click on the checkbox appearing with each item to select the item(s) required to be unmapped.

Step 24: After selecting items required to be unmapped, please click on “Remove selected item mappings” to complete the operation. Click on the “Cancel” button on the left of “Remove selected item mappings” to cancel the process.

Map new items
Step 25: Click on the “Map new items” to search items for mapping.

Step 26: After confirming the non-existence of the target item in the existing mapped items list, please click on “Map new items.” Then, enter keywords/keyphrases in the search field to search for target items.
Click on the “Search” button as highlighted on the below screen.
You must know that you can enter keywords or keyphrases from any metadata field. Search field under “Map new items” work exactly like the basic search field of DSpace.

Step 27: Users can select target items from the search results by clicking the checkbox appearing with items.

Step 28: After selecting target items, please click on the “Map selected items” button at the bottom of the page to complete the item mapping process.
Click the “Cancel” button to cancel the activity and return to the collection edit page.

Step 29: A prompt confirming successful mapping of items will appear upon completing the task, as demonstrated below.

Mapped items will appear in the collection and under the “Browse mapped items” tab, as demonstrated below.

Export Collection
DSpace provides a feature of exporting metadata of any collection into CSV format. Users can utilize this CSV file for multiple purposes like creating ad-hoc reports, importing metadata into other systems, or for any use case as per its requirements.
Exporting a collection
Users log in using their log-in credentials and follow the steps mentioned below to export a collection’s metadata.
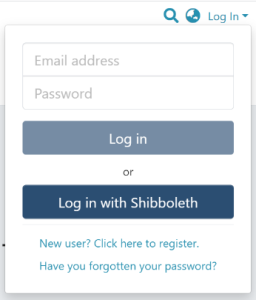
Step 1: Go to the DSpace home page and click on the “Log In” link at the top right corner of the screen, as illustrated below.
Step 2: Users will see the admin menu on the left-hand side of the screen, as highlighted in the illustration.

Step 3: Rollover your cursor over the Export menu and click on metadata.

Step 4: Type the collection’s name in the textbox and click on the target collection from the list appearing in the popup.

Step 5: Click on the “Export” button in the popup to continue with the item metadata-export or click the “Cancel” button to cancel the process.

Users will see the success prompt confirming the creation of the export process upon successful completion of the process, or else the application will show the failure promptly.

Step 6: Users will be redirected to the metadata export page with a csv download link, as highlighted in the screenshot below. Click on the link to download the file.

Users can perform the following actions on this page:
- Click on the CSV file link to download the metadata CSV. This file contains metadata of items stored in the exported collection.

- Click on the log file link to download. The Logfile contains details of steps performed during the export job.

Community management
The community is the primary storage level in the DSpace’s storage hierarchy that holds sub-community and collections. This document provides an overview of creating, editing, and deleting a community. The documentation below assumes that the user has the relevant authorizations. For example, the admin menu and edit buttons would appear to a user having community administration permission.
If you’re unsure about community administration permissions assigned to your account for the target community, contact your system administrator.
Create Community
Step 1: Login using your credentials

Step 2: Rollover your cursor on the “+” sign

Step 3: Click on the “New” link and click on “Community” to proceed with the community creation.

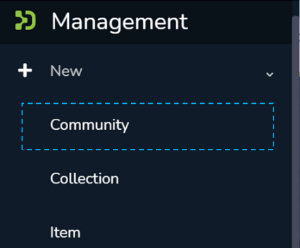
Step 4: A popup providing the option to either create a Parent community or a sub-community will appear, with a list showing existing communities. Create your new community by either:
- Click on “Create a new top-level community” to create a top-level community.
… or… - Typing the name of the existing parent community in the search field to add a sub-community within. Upon typing a few letters of the community’s name, a list of communities having those letters or words will appear. Click on the community name to create a sub-community.
Step 5: As per the user’s choice in the previous step, the application will open the create community or create a sub-community form to populate information regarding the community’s profile. Below is the explanation of the information that needs to be populated on this form.
It is important to understand that both “Create Community” and “Create Sub-community” forms are identical. The critical difference between both is that the “Create Community” form helps create a top-level community while the latter helps create a sub-community within a community or a sub-community.
The description provided below the following screenshot remains identical for both Community and Sub-community creation.
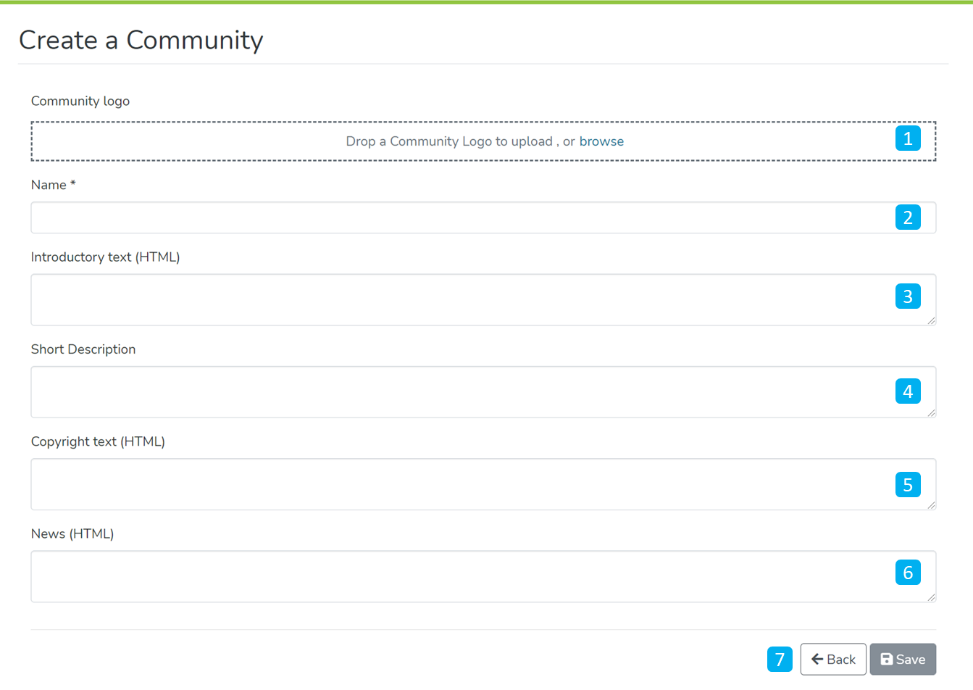
- Community logo – Select the community’s logo by clicking on the ‘browse’ link to select an image file. It is advisable to maintain uniform dimensions of the logo across the repository.
- Name – Enter the community’s name. It is marked with ‘*’ to show it is a mandatory field.
- Introductory text (HTML) – Users can add introductory text providing an overview of the contents stored in the community. One can utilize HTML tags to format the text or continue entering plain text content.
- Short Description – This field can have a one-liner description of the community that appears with the community name in the list of communities on the parent community page (or on the DSpace’s in the case of a top-level community.
- Copyright text (HTML) – Users can enter copyright information here. Fields marked with (HTML) support HTML tag-based formatting.
- News (HTML) – Enter news about this community. Users can update this by regularly going to this section via the editing community.
- Action Buttons – Users can click on the appropriate button as determined. Clicking on the Save button will add the community to the repository.
Step 6: Click on the ‘Save’ button to complete the Community creation. A success prompt will pop up upon community creation, and the user will be re-directed to the community homepage.

Success prompt upon community creation

Community homepage
Delete Community
Delete Community
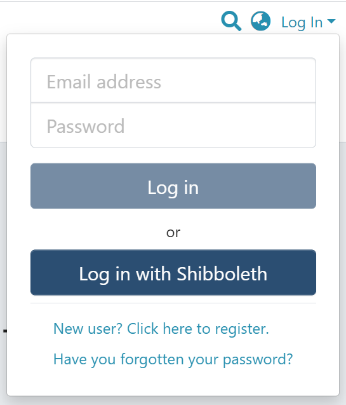
Step 1: Login using your credentials
Step 2: There are multiple ways to navigate to the controls to delete a community. One of them is by going to the target community and clicking on the button with the pencil icon next to the community title ie the ‘Edit community’ button. Alternatively, follow the steps provided here.

Step 3: Click on “Edit” and click on “Community” to proceed with the edit community process.

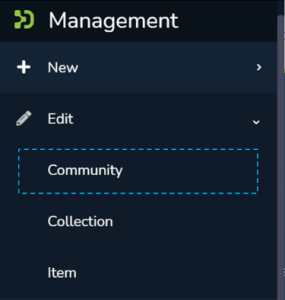
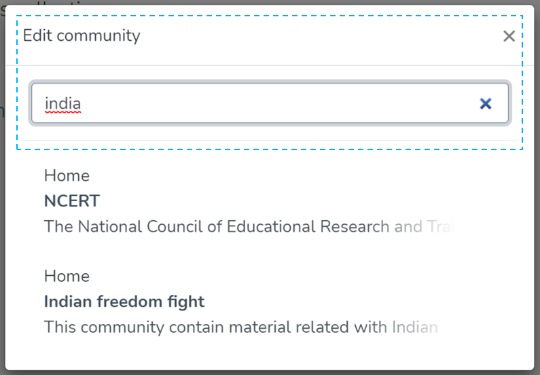
Step 4: A popup showing a search box and a list of communities will appear. Type the name of the community you want to edit in the search field. Upon typing a few letters of the community’s name, a list of the communities having those letters or words will appear. Click on the target community to initiate editing.
Step 5: The application will take the user to the edit community form. To initiate the community deletion process, the user needs to click on the ‘Delete this community’ button.

Step 6: Click on the Confirm button to continue with the community deletion or click on the Cancel button to return to the previous page.

Users will be re-directed to the homepage of DSpace upon successful completion of the community delete, and a popup confirming the community deletion will appear.

Edit Community
Edit Community
Step 1: Login using your credentials
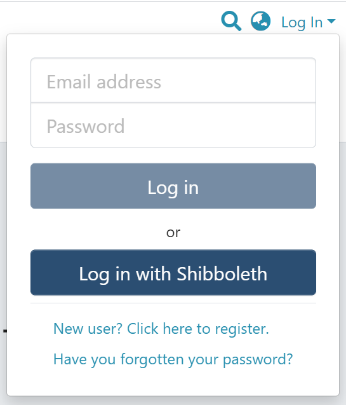
Step 2: There are multiple ways to start editing a community. One of them is by going to the target community and clicking on the Edit button, the button with the pencil icon, beside the page title. Alternatively, follow the steps provided here.
Rollover cursor on the pencil icon in the admin menu.

Step 3: Click on “Edit” and click on “Community” to proceed with the edit community process.


Step 4: A popup showing a list of the communities in the DSpace and a search box will appear. If you are already on the page of the community, it will appear at the top of the list, so you can select it by clicking on it. Otherwise, type the name of the community you want to edit in the search field. Upon typing a few letters of the community’s name, a list of the community(ies) having those word(s) will appear. Click on the target community to initiate editing.
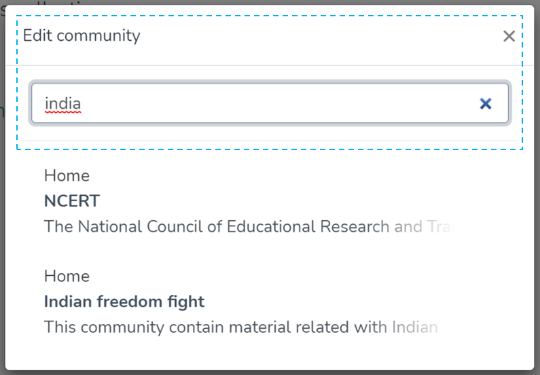
The application will take the user to the edit community form to perform various actions to edit the community. Each tab is explained in a separate process in this document.

- Delete this community – The button provided for deleting the community. Detailed steps are explained in the latter part of this page.
- Tabs – Edit community has a variety of functions, which are grouped logically across various tabs. Below is the summary of these tabs
- Edit Metadata – Tab covers activities related to editing the community’s profile information.
- Assign Roles – This tab allows users to create specific roles for the community, usually, the role of Administrator of the community, see further detail below.
- Curate – Users can set up various workflows related to content curation in this tab
- Authorizations – Under this tab, users can manage various groups and their different access rights in the community, for example, this tab could be used to grant an individual the administrator role, see further detail below.
Edit Metadata
The Edit Metadata tab allows users to update the community’s profile-related information, a.k.a. community metadata.
Various actions on this tab are explained immediately after the Edit Metadata illustration is added below.

- Community logo – Click on the delete button to remove the existing logo. If no logo exists, then a widget allowing the user to add a logo is displayed here.
- Name – Update the existing community’s name in this field.
- Introduction text (HTML) – Update introductory text if already added or can add new text. One can utilize HTML tags to format the text or continue entering plain text content.
- Short Description – Update the description of the community or add a fresh short description for the community.
- Copyright text (HTML) – Update copyright-related information in this field. This is usually displayed at the foot of the community landing page. Fields marked with (HTML) support HTML tags-based formatting.
- News (HTML) – Add/Update news specific to this community in the field. This is usually displayed with the heading ‘News’, underneath the community’s introductory text, and above the list of collections and sub-communities.
- Action Button – Clicking on the Save button will update the metadata information for the community.
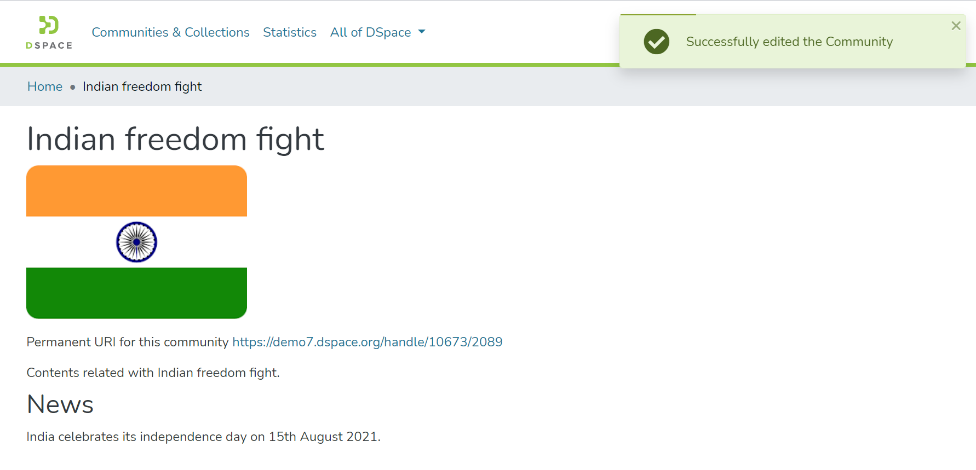
Click on the ‘Save’ button to save the information updated in the ‘Edit Community’ tab. A success prompt will appear, confirming the successful edit of the community.
Assign Roles
This tab allows authorized users to create a Community administrator role. Click on the “create” button to assign a community administrator role.
The roles available on this tab are explained below this illustration.

Administrators – Community administrators can create and manage sub-communities and collections. This user profile can also assign rights to edit item metadata and map existing items from other collections.
Curate
This tab provides various workflows for curating items stored in the community. Below are standard flows, and there can be customized curation workflows as well
- Profile bitstream formats
- Check for Required Metadata
- Check Links in Metadata
Users must select a workflow from the dropdown list and click the “Start” button to initiate the curation process.

Authorizations
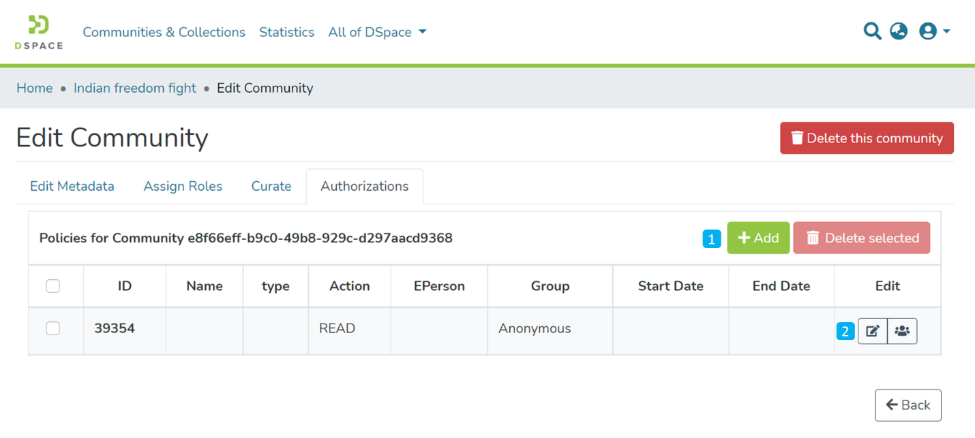
Users can view and edit community resource policies defined for the community, in the Authorizations tab. Users can create policies in addition to the standard policies created from the Assign Roles tab. Following are the key actions in this tab.
- Manage Policies
– Click on the Add button to create a new resource policy or select policies from the table, see further detail below.
– Alternatively, click on the Delete selected button for a batch deletion of the policies. - Edit policy and members in a policy – Click on the edit button to edit an individual policy or click on the group icon to edit the user group eg to add or remove individual ePersons.
Click on Add button to create a new Authorization policy
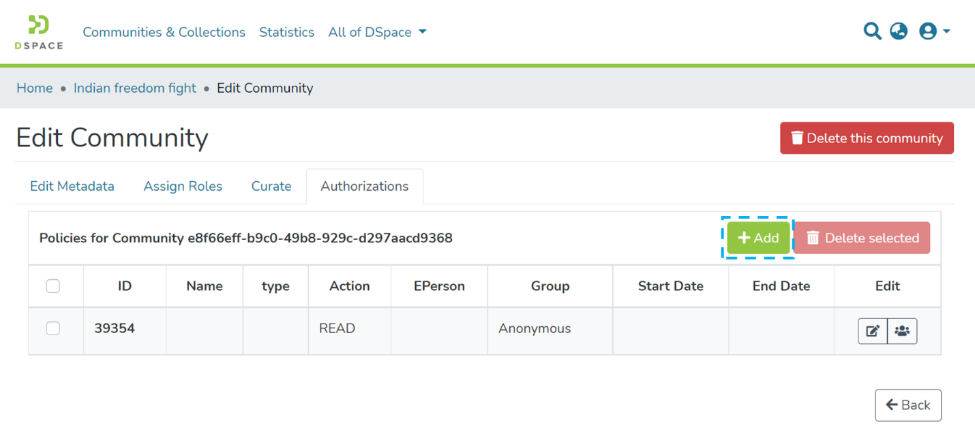
Users can enter the information to create the policy and click on the submit button. Please see the description of each field followed by the below screenshot.

- Name: Enter the Policy name in this field.
- Description: Enter the Policy description here for future reference and understanding of other users.
- Select the policy type: The user can select one of the following policy classification types from the list
- TYPE_SUBMISSION: a policy in place during the submission
- TYPE_WORKFLOW: a policy in place during the approval workflow
- TYPE_INHERITED: a policy that has been inherited from a container (the community)
- TYPE_CUSTOM: a policy defined by the user during the submission or workflow phase
- Select the action type: The user can select one of the following actions from the dropdown list. For example, select “READ” to assign read rights to the user or user group.:
- READ
- WRITE
- REMOVE
- ADMIN
- DELETE
- WITHDRAWN_READ (disables item access)
- DEFAULT_BITSTREAM_READ
- DEFAULT_ITEM_READ
- Start date – end date: The user can select the start date and end date of the period for which the policy will be active, should they want to apply this policy for a fixed period only. If the start date is left blank, the policy comes into effect immediately.
- The ePerson or group that will be granted the permission: List of users/groups selected for granting permission under the policy
- Search for an ePerson / Search for a group: Select ePerson or group to add
- Search field: Enter keywords for searching the ePerson/Group
- ePerson/Group list: Click on the select button against the user/group you want to add to the policy
- Submit/Cancel button: Click on the Submit button to complete policy creation or click on the Cancel button to cancel the entire process.
Upon successfully creating the policy, you’ll see a confirmation prompt, and the user will be back on the Authorizations screen.
